|
|
What if your basement leaks?
I built a basement in 2009 with an NHBC structural warranty and an insurance backed guarantee my concrete would not leak from QANW.
I did not hear anything during my 6 years of responsibility. QANW insured it for the remaining 4 years.
It is interesting, as well as good advice to you, that QANW would not insure the basement until it had been inspected:
After the roof and windows were complete,
after the basement had been cleared of rain water and dried
and the inspection was not until after a period of heavy rain.
Sometimes leaks are the architect's fault. Poor detailing at the top of the retaining wall or under door frames.
However, fixing leaks through bare concrete is easy.
The point is, please stop what you are doing before you cover your walls in anything and thoroughly check for leaks before you continue. It's a lot cheaper.
If you have my guarantee to fix any visible leak I will. But leaks have to be visible. I won't pull your plasterboard off to find a leak, neither will I compensate you for plasterboard, decorations or furnishings.
The time to find a leak is after you were able to dry your basement and before you cover the concrete over.
|
|
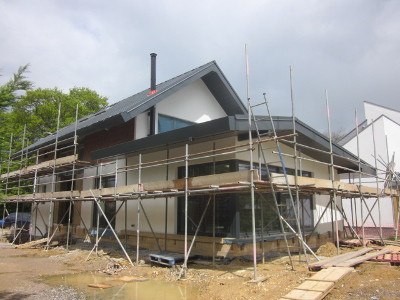
There is a basement beneath this house 16m x 9m.
The basement floor and walls were finished during August 2012 though the clients did so much of the work themselves that they did not move in for almost 2 years.
I checked with the owner on September 26th 2013 and he said it is all dry.
However after they moved in they saw damp patches in quite a few places. Loads of polystyrene ICF had to be taken off to find where water was actually getting in.
Most damp areas turned out to be condensation and weren't leaks at all. 3 were little leaks that took me half an hour to fix.
|
This was one of the last times I had used ICF. I was already using timber instead by 2013 and had discovered when I took the first timber off cooling contraction cracks that required more horizontal steel to prevent.
Therefore, these were the last leaks I repaired through my work, although the last leaks were those I fixed in the first project after I stopped using ICF.
Since 2013 I have always removed the formwork and not found a single leak through my work.
No leaks are necessary. They will always be due to poor workmanship.
Poor workmanship can be by either your architect or your structural engineer if they haven't much experience of domestic basements.
More likely, poor workmanship will be by a sub-contractor.
Concrete as prescribed by me with my additive is fully waterproof.
If joints leak they were not properly formed.
If an area of concrete leaks, it was not properly placed or properly compacted.
The two problems are completely different and need completely different solutions.
Is the area of concern dry at the moment or is water coming through?
Dry concrete can be painted to protect it, but if water is coming through it would push most things off before they set. So sometimes you can leave a leak till a dry spell in the weather when paint will work.
If water is coming through, your repair material needs to set in seconds while you press it in place.
Is the area of concern a joint, or a wide area?
|
|
|
A joint or crack should be chiselled so that the joint or crack itself is at the back of a groove and repair mortar can be pushed in, compacted and held firmly in place till it sets.
|
If water is coming through you need a rapid setting mortar such as Thoro Waterplug from BASF. It sets in about a minute without getting unduly hot.
The concrete must be completely clean and free of water. If water is coming through blow each small section free of water before applying the plugging mortar. Damp is OK. Wet is not.
|
|
|
|

A wide area is simple to cover with a liquid membrane, on the outside, if you have not backfilled yet. Be mindful the membrane is easily damaged when you backfill.
But if you wait until water is coming through inside you have a far greater problem. Resin injection might fill cracks but it won't cure porous concrete.
I had a call from someone claiming his life was ruined by Sika trying to stop water getting through the concrete their product should have waterproofed.
He said they could not stop water coming into his basement despite trying resin injection and Sika render.
This means that recognising a potential problem before it becomes a problem, and dealing with it properly early will be easier and cheaper.
Otherwise you will have to dig up the floor, put in a sump and cover the entire inside in internal drainage membrane.
In fact, most basements have the drainage membrane anyway. But if all your workmanship is poor, poor workmanship will include the plumbing to remove the water.
|
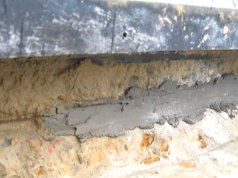
The repair above was a precaution and carried out in dry conditions (dry after the area was blown clean with the air compressor). That is why one layer of Thoro Waterplug was sufficient.
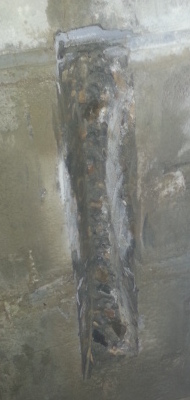
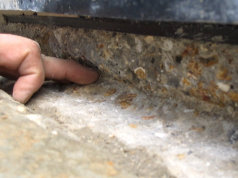
This repair below is in wet conditions. An actual leak from a basement built in 2012 before we stopped using ICF and discovered regular vertical cracks where there wasn't enough horizontal steel.
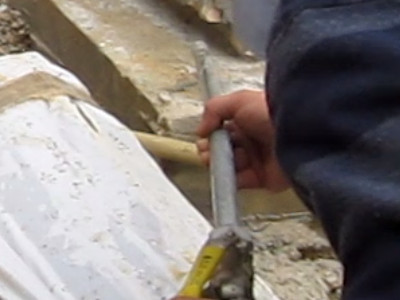
This time our chase is cut further in with a disc cutter. About 30mm deep. Immediately after brushing away what water we could we applied the waterplug a third deep.
Then again two thirds deep after the first had set, 5 minutes or so.
In this way, the first layer slows the flow despite the flow getting into the mortar and diluting it too much to stop the flow on its own. The second layer stops the flow still further because the mortar is diluted less.
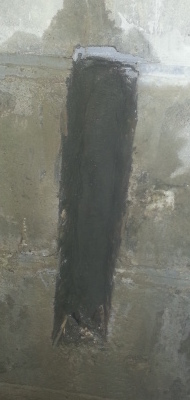
The third layer has hopefully stopped the flow completely because it was able to set before any water from the leak penetrated it.
If you want to be more certain you will need to fill your chase in more layers. That might mean cutting it in deeper, but don't cut steel.
One trick I discovered was to throw more powder on the mortar as it got wet so that it remained only damp and set strong.
Pressure injection.
The theory is really quite simple.
A hole is drilled from the concrete surface at an angle so that it passes through the crack.
A packer, a valve, is fitted in the hole between the concrete surface and the crack.
The packer grease nipple is connected to the pressure injector and the hole beyond filled with PU. The pressure will force PU into the crack as well.
When the PU comes into contact with water, whether immediately or in the future, the PU will try to expand into a foam 15 times the volume.
The foam is hydrophobic, water repelling. The leak stops.
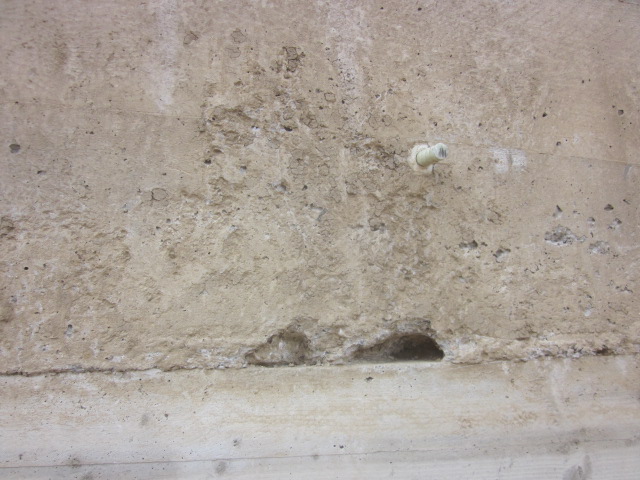
This crack is ready to be injected.

|
Afterwards the top of the packer is unscrewed and removed to leave no part proud of the wall.
Different things happen when you inject, depending on what the situation is inside the concrete. We have had resin come out of nearby holes that we had to abandon because we hit steel whereas at other times even with packers only 100mm apart the leak has not been completely stopped midway between the packers.
Machines are safe at more than 5,000 PSI, which is too much for concrete. In our experience packers should be filled at a maximum of 3,000 PSI to prevent the resin cracking the concrete.
Below you see 3 slightly different lengths of packers (70mm, 90mm and 110mm long). The valved pipe with a grease nipple adaptor fitted and a spare grease nipple adaptor. The grease nipples in each packer keep the resin in.
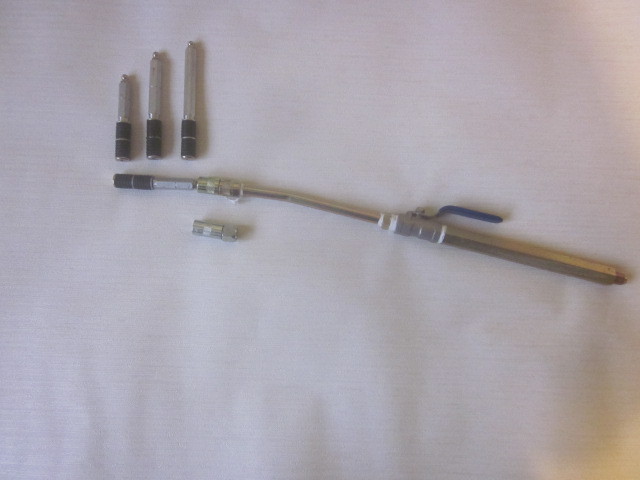
The silver section of the packers screw off afterwards so that nothing is left proud of the concrete surface. The hole needs to be made good later.
There are some easy to follow videos on You Tube, by various companies around the world, for other ideas about repairing cracks with PU injection.
I had all this kit for a few years. I hired it out to others after I realised it's limitations and I wouldn't need it any more. As it got damaged I didn't replace it. I don't have any any more.
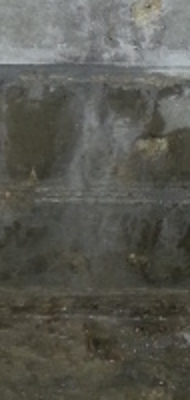
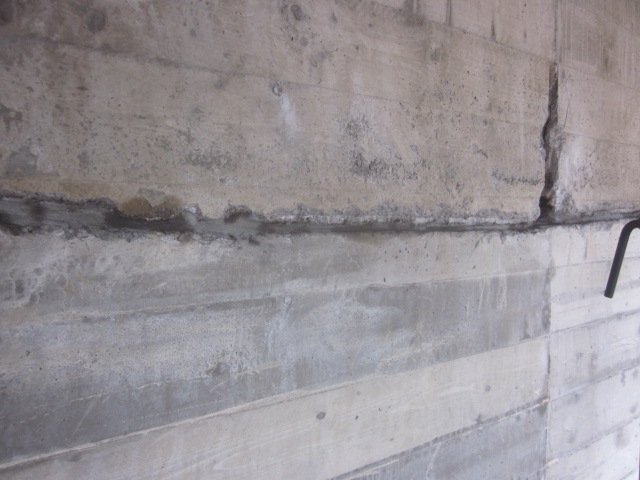
This leaked.
Workmanship was to blame. The advice was not followed in full.
In the photo you see two distinct concrete pours and therefore a concrete joint. The first concrete was scabbled and, as usual, contained no tapes or strips. You can see where there had been a little excess spray foam.
I had spotted mud when I inspected prior to the second pour and I made them take a panel of wood out and use their jet wash and my compressed air lance to try to clean it in time. You can see that some mud that was on the bottom blew up against the formwork and stuck to the concrete before the formwork was removed.
No tape or strip would have worked covered in mud either. The question is, did they clean properly?
It leaked all the way along that wall.
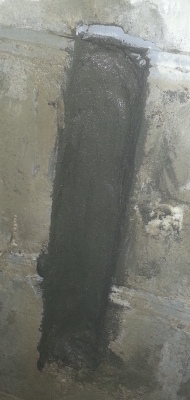
The workforce were mostly a lazy lot. I showed them how to do the repair properly but they did not cut the chase deep enough, they did not fill in enough layers and they mixed the repair mortar too wet so it did not work as well as it could. They only succeeded in slowing the water ingress.
So I took along a pressure injector, valves and polyurethane resin that expands 15 times when in contact with water and stopped the leaks completely.
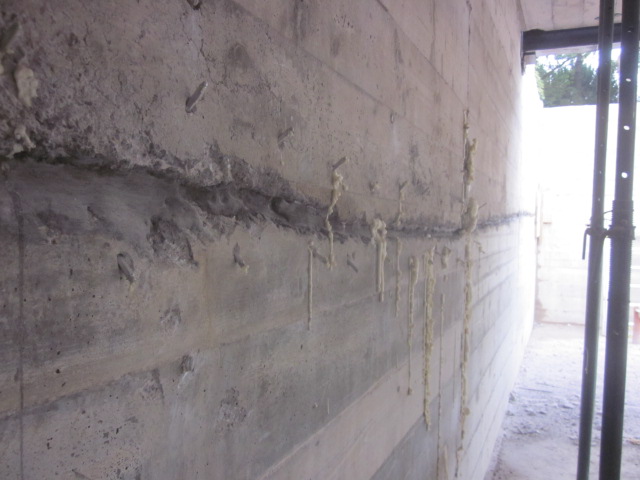
There is no need to have any leaks. This job had over 40 loads of concrete most of which is perfect.
|
|
|